5.1 REAL AND SIMULATION MODE
![]()
INTRODUCTION |
A robot is usually understood as a computer-controlled machine that can perform an activity, previously done by humans. If the machine can also detect the surrounding environment with the help of cameras and sensors and can then react appropriately with actuators (motors, valves, speech synthesizers, etc.), we speak of an intelligent system. If the behavior of such a system is human-like, we speak of an android. .
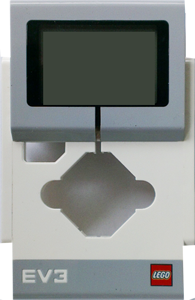
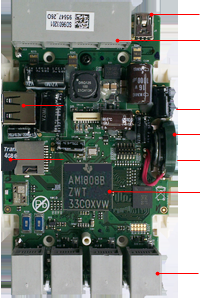
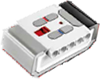
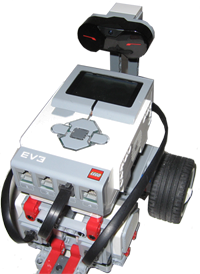
Artificial Intelligence (AI) deals with the interesting question of exactly how a computer system can be described as "intelligent". In order to answer this question, we must first define what is meant by an “intelligent” machine. One possible approach to the definition of intelligence is the Turing Test. Here you will be concerned with more simple questions and you will learn to handle a simple robot equipped with touch, light, sound, infrared, and ultrasound sensors, and also with two wheels driven by electric motors, which allow it to move forwards and backwards, and even rotate. The motors and sensors are controlled by the built-in computer, which is why people also call robots an embedded system. If it often consists in a simple computer chip, it is called a microprocessor (or a microcontroller). Nowadays, embedded systems play an extremely important role and you can find them in many everyday devices, for instance in smartphones. Surprisingly, most coffee machines, washing machines, televisions, cameras, and other similar electronics are also embedded systems. In a modern car, there are up to 100 microcontrollers that act as embedded systems in places such as the engine control or the anti-blocking system. Therefore, you should be aware that you are also getting to know many general principles for embedded systems while learning about robots. With the world famous robotics kit by LEGO Mindstorms you can learn the important aspects of robotics in a playful way. The kit consists of a microprocessor-controlled brick and a variety of components used to construct different robot models. The brick has gone through several stages of development: earlier it was called RCX, then NXT, and more recently EV3. The EV3 brick is an embedded system with motors and sensors controlled by a modern ARM processor. If you open it, its electronic components will be visible.
Once you turn on the brick, a firmware starts on the microcontroller (or with EV3 the Linux operating system) and a simple menu appears on the display. With this, you can already run programs stored on the brick, in autonomous mode. For the external control mode on the EV3, you have to start a helper program (BrickGate) which interprets commands that are received through a Bluetooth connection, for example the command to turn on a motor in a certain rotation direction or to report back the measured value of a sensor. With the NXT, this program is a part of the firmware.
|


Robots, androids, artificial intelligence, embedded systems, microprocessors, microcontrollers, blocking/non-blocking methods |
PREPARATIONS |
With TigerJython you can simulate the robot (simulation mode) or using autonomous or external control modes (real mode). You thereby use different class libraries which, however, offer the same programming interface (Application Programming Interface, API) so that the programs are practically identical for all modes. The only things that have to be adjusted are imports and possibly some timings used in the program. Simulation mode: If you do not have an NXT or an EV3 available to you, you can nonetheless work through the topic in simulation mode. The images required for the simulation are already included in the distribution of TigerJython. Real mode:
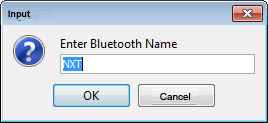
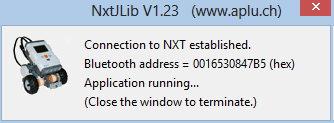
Using the LEGO NXT: To pair it with the computer, you proceed as you would with other external Bluetooth devices such as smartphones, Bluetooth handsets, printers, etc. With Python, you can use the NXT only in its external control mode. For this, you write a regular Python program in TigerJython using the module ch.aplu.nxt and then hit the green Run button to start. First you will be asked for the Bluetooth name and then the connection with the brick will be established. During the program execution, a window with the connection information remains open. If you close this window, the connection to the NXT is interrupted.
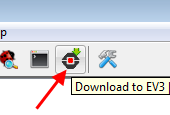
If there are several LEGO NXT's in the room, the names for each must be different so that there are no conflicts. You can find a tool for changing the name here. You can also use the Bluetooth address instead of the Bluetooth name, which you can figure out with the help of different tools (one place to find it is shown above: it is written out in the connection dialog each time that a connection is established). The BlueCove library is necessary for Bluetooth communication. Download the files here and unzip them in the subdirectory Lib of the directory in which tigerjython2.jar is located. Using the LEGO EV3: After booting the EV3 with leJOS and successfully connecting it via Bluetooth PAN, you need to start the BrickGate server on the brick, which you can find in the menu "programs". To use the EV3 in autonomous mode, check both boxes on the libraries tab in the settings of TigerJython, activate EV3 download and run after download. You will then find an additional EV3 icon on the toolbar.
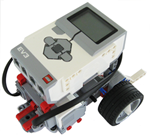
For the external control mode, you click on the green Run button as usual. Just as with the NXT, you will first be asked for the Bluetooth name and then a window will open with the connection information. If you want to run the same program autonomously, simply click on the EV3 button. The Python script is then downloaded onto the EV3 and executed there. Its name also appears on the display of the EV3 and it can always be executed again with the Enter button, even without a connection to the PC. In the programs we assume that for the EV3 you are using the new motors and sensors from the EV3 product line. The EV3 color sensor also serves as a light sensor. However, the old NXT motors and sensors are still supported for the EV3. You simply have to put "Nxt" everywhere before the class name, i.e. NxtMotor, NxtGear, NxtTouchSensor, etc. |

MOVING FORWARDS AND BACKWARDS, TURNING |
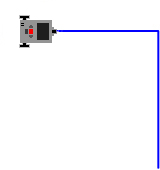
In your first robot program, the robot should move for certain times, which are hard coded in the program. The robot library is object-oriented and depicts reality by a model. So, when in reality you pick up the LEGO brick when constructing the robot, in the software you create an instance of the class LegoRobot() with robot = LegoRobot(). Next you take two motors and put them together to a gear, which you can express as gear = Gear() in the software. Then you connect the gear motors to the motor ports A and B, which you formulate as addPart() in the software.
Once you send a movement command to the robot, the current state is ended and replaced by the new state. At the end of the program you should always call the method exit(). Once called, all motors are stopped and in the real mode the Bluetooth connection is also interrupted, which is necessary for the next program to start successfully. (If the program does not end correctly you might have to turn the brick off and on again.)
|
MEMO |
|
A Gear has two motors. Instead of controlling the motors individually, you can use commands that affect both engines simultaneously. The class libraries for both the simulation and the real mode are designed so that their programs are almost identical. You can first develop your program in the simulation mode and then with a few adaptations you can execute it with the real robot. You can use the EV3 autonomously or externally controlled. In both cases the BrickGate program must be started on the EV3, which receives and appropriately interprets the commands sent from Python. Since no errors are displayed while running in autonomous mode, you should always first test the program in external control mode (green button) and only then download it to the brick using the EV3 button and execute it there. |
MOVING WITH BLOCKING METHODS |
|
MEMO |
|
You must distinguish between blocking and non-blocking methods. Non-blocking commands cause the robot to change state and return immediately. If you call a blocking method, the program freezes a certen time interval, i.e. the next statement is only executed when the time interval has expired. At first glance, it might seem easier to always use blocking methods. But with them you get a major disadvantage. While your program is blocked you cannot execute any other actions, so for example, you could not read any sensor values! If the program hangs during execution, in external control mode you can cancel it by closing the connection information window. In autonomous mode in the case of an emergency, you can simultaneously press the two buttons DOWN+ENTER . |
EXERCISES |
|
ADDITIONAL MATERIAL |
INFRARED REMOTE CONTROL |
A versatile infrared sensor comes with the EV3 robot that can be used in many ways. It is already included in the LEGO Home set (including the remote control box), but it must be purchased separately if you have the Education set. You can use the IRSensor in one of the three following ways:
|
MEMO |
The methods isEscapeHit(), isEnterHit(), isDownHit(), isUpHit(), isLeftHit(), isRightHit() return True, if you click the corresponding buttons on the EV3 in autonomous mode. However, in external control mode, they pertain to the keyboard keys ESCAPE, ENTER, CURSOR-DOWN, CURSOR-UP, CURSOR-LEFT, CURSOR-RIGHT. For this, the connection information window must be active (click in it with the mouse to activate it). |